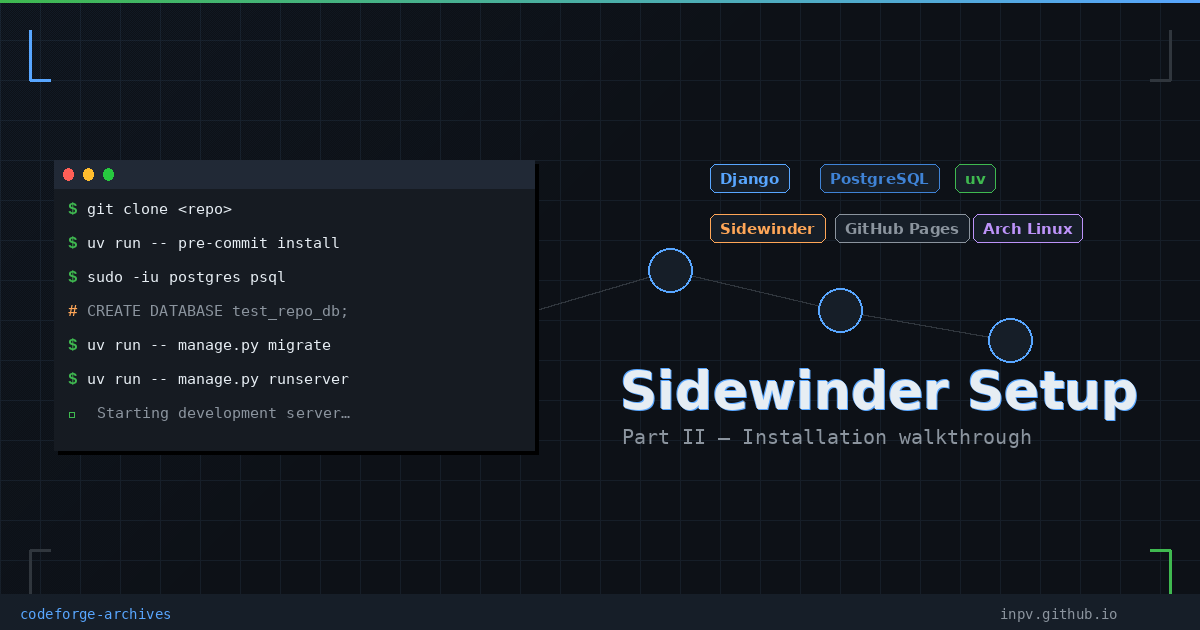
In the second part of the article series we're going to go through most of the details of Sidewinder installation process, for the official documentation is pretty sparse in that regard.
See the first article with the overall bird's eye view plan description here.
So first, we clone the repository as a template to start clean without leftover commits.
I recommend setting the repo in Github settings as a private one, because only the distilled version is going to be public in our case.
Press "Use this template - create a new repository"
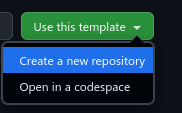
, then name your repository in the "General" section with a unique name inside your account's scope and choose "Visibility - Private" in "Configuration" section.

Then press "Create repository" button.
The repo will be generated shortly after.
Then you'll need to clone the repo with either CLI or GUI of your IDE. Let's use PyCharm for this.
Open PyCharm, choose "File - Create from version control" and paste the new project's URL copied from address bar to the "URL" field, in our case it's going to be "https://github.com/%username%/test-repo" and press "Clone".
Choose "Log In via Github" in the context window and the login page will be opened in your default web browser.
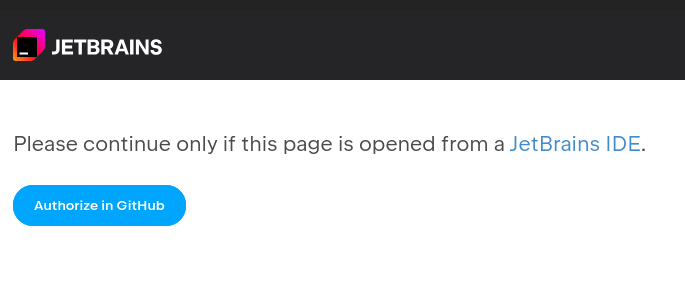
Press "Authorize in GitHub" button and close the tab afterwards when you see this text:

You may see that when you open the PyCharm terminal, the interpreter is not yet set up. It's because Sidewinder requires uv package manager to be installed and then set up for the project.
Install uv according to the official docs with "curl -LsSf https://astral.sh/uv/install.sh | sh" command (since we're running on Linux) and verify the installation according to the first steps guide.
Then change your current directory to the one of our new project, if you haven't already, with
cd ~/PycharmProjects/test-repo
Next, configure the project's interpreter in PyCharm.
First run
uv sync
to install all necessary dependencies and avoid missing ones.
Then select the interpreter menu in the lower-right corner of the IDE and choose:
Add New Interpreter => Add Local Interpreter => Select Existing Environment
Select the virtual environment that was just created by uv for the project. PyCharm may spend some time indexing packages, so expect high CPU usage.
After configuring the interpreter, close the Local terminal tab and open it again. You should now see the virtual environment name in the prompt, for example:
(sidewinder) [%username%@%hostname% test-repo]$
When the interpreter is up and running, run pre-commit hooks with
uv run -- pre-commit install
Then install Playwright with
uv run -- playwright install
Now we need to configure the .env file.
First copy the example file with
cp .env-example .env
We don't need to edit anything in the file except for PROJECT_NAME to anything how you would like to call your project, in our case PROJECT_NAME="Test Repo" and DJ_DATABASE_CONN_STRING to however we'd like to call our new database, that we'll create next, for example DJ_DATABASE_CONN_STRING=postgres://postgres:postgres@localhost:5432/test_repo_db .
Default DJANGO_SECRET_KEY and DJANGO_DEBUG values are already added in Sidewinder, but you may also modify them as you see fit.
Don't forget to check that your .env file is added to .gitignore, even for a private repo.
Now we'll need to install postgres system-wide using however the package is called in your distro. On Arch it's postgresql.
Run
sudo pacman -S postgresql
from your main user.
Note that on a clean Arch postgresql setup you may also have to initialize the database cluster with
sudo -i -u postgres initdb --locale en_US.UTF-8 -D /var/lib/postgres/data
, however, you should run initdb only if the service hasn't been initialized yet, check it first with:
sudo ls /var/lib/postgres/data
If it's empty or the directory doesn't exist, you need to run initdb.
Then start and enable the postgresql systemd service:
sudo systemctl enable --now postgresql
Verify the service works and is enabled:
sudo systemctl status postgresql
Create the database (with the name we mentioned before) and alter the default postgres user (we don't really need another one for local dev and we already created the default postgres database role during initdb, regardless of whether it was manual or automatic):
sudo -i -u postgres psql
Then inside the console:
ALTER USER postgres WITH PASSWORD 'postgres';
CREATE DATABASE test_repo_db;
NB! Use "postgres" password ONLY for local development, never in production.
Verify the user with \du and the database with \l, then exit the console with \q.
Then test the direct connection to the database with
psql -U postgres -d test_repo_db -h localhost
You should get an output and SQL prompt with
psql (XX.X)
Type "help" for help.
test_repo_db=#
Again close the console with \q.
If you don't need geolocation, you need to remove any GeoDjango-related entries from INSTALLED_APPS in appname/settings.py. Usually it's
django.contrib.gis
If you don't do it, you can get an error like
ImproperlyConfigured: Could not find the GDAL library
, because the Django GIS extension will demand GDAL to be installed even if the geolocation features aren't used.
If you plan to use geolocation features, install PostGIS database extension and some libraries for it to your system. On Arch that can be done with:
sudo pacman -S postgis gdal geos
Switch to postgres user and launch the database console with
sudo -i -u postgres psql
Then switch to our new database (otherwise it would be applied to the default postgres database) and enable PostGIS extension on it with
\c test_repo_db
CREATE EXTENSION postgis;
Verify that PostGIS is actually installed with:
SELECT PostGIS_Version();
It should yield an output of this nature:
3.x.x ...
Exit the console with \q and return to your main user with
exit
Then create your new app inside the appname folder to not rename anything and to achieve better separation of concerns:
mkdir appname/test_repo
uv run -- manage.py startapp test_repo appname/test_repo
Use underscores in the directory and app names, otherwise you'll get an error:
CommandError: 'test-repo' is not a valid app name. Please make sure the name is a valid identifier.
Then we need to wire the new app to our configs.
First, change the value of the name from test_repo to appname.test_repo in the new appname/test_repo/apps.py file.
Second, register the new app in appname.test_repo format in INSTALLED_APPS in appname/settings.py.
Since we are going to be using Huey + Redis task queueing, we need to install Redis first before we run the server. On Arch it's
sudo pacman -S redis
Then start and enable Redis' systemd service with
sudo systemctl enable --now redis
Verify that Redis works with
redis-cli ping
Should yield:
PONG
Then run
uv run -- manage.py makemigrations
before actually migrating - it's useful during the first run on local dev environments, for it generates migration files for your new app before anything exists in the database.
Then run
uv run -- manage.py migrate
Then check that there were no issues with
uv run -- manage.py check
That should yield an output like:
System check identified no issues (0 silenced).
Create the superuser for dj-admin with
uv run -- manage.py createsuperuser
Then finally start the local server with
uv run -- manage.py runserver
The server should be now up and running.
Enter the superuser's credentials at login at the admin panel.
This setup should be enough to start developing locally.
In the next part of the series we'll cover how to build the basic website structure according to Django's MVT architecture and add markdown support for inline code and code blocks, as well as distillation and fixture loading mechanisms to display the actual content of the posts across all environments.